


In a previous post on Imbolc, I wrote a bit about Brigid's cross and gave you a link to a website which describes how you can make one yourself. It inspired me to try and make one of my own. :) It seems like it has worked out pretty well but with a few modifications.
The aforementioned post referred to a certain tradition on the Isle of Man. On the last day of January, one person from each household would gather reeds/rushes and return to their family's house (just to be clear, every family did this for itself). He/she would knock on the door to which the woman of the house would answer by sending someone to get it. She would bid "Brigid" (or rather the person representing her at the door) a warm welcome to which this person would reply: "God bless the people of this house". After this, the rushes would be sprinkled with some kind of holy water and everyone would join in the making of the crosses. After enough crosses had been made, the rest of the rushes would be buried and a feast would follow! On the first day of February, all the crosses from last year would be burnt and replaced by the new ones in the household.
 The Brigid's cross is a symbol of Ireland since Brigid herself is an Irish deity and St. Brigid an Irish saint. The Christian version of the story goes as follows. St. Brigid started making this cross at her father's deathbed (the other version claims that it wasn't her father's, but an nobleman's/count's deathbed...but we'll just stick to the first version as not to complicate). Her father was a Pagan and hadn't been christened but once he heard what the cross she was making represented he realized his mistake and changed his mind. Brigid's cross is traditionally made out of rushes because story has it that St. Brigid made her cross form the rushes covering the floor (which was common in her time to keep the room and floor warm but also for comfort).
 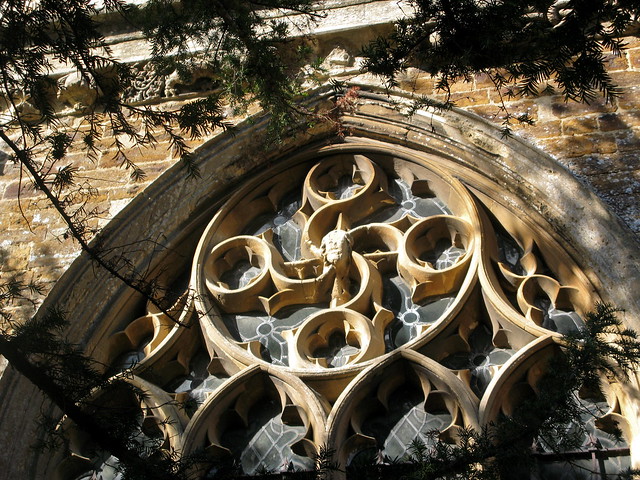 |
| An example of a fylfot on a window in Bloxham, England |
The symbol itself is made up of a square-shaped center from which four arms that extend from it. Some believe that this symbol is closely related to that of the wheel of the year which is also center-oriented and has four arms which represent the four Sun Sabbaths (the two equinoxes and the two solstices) which divide the year into the four seasons. Two more symbols which it resembles are the swastika (probably a familiar symbol to you all that got its name after the Sanskrit word svastika, referring to any lucky charm) and the fylfot (which in English means "to fill the foot" of something or rather the bottom of something. This symbol was used to fill the empty spaces at the bottom of windows or drapery in Medieval churches).
Brigid's cross is usually hung over the entrance to a house in order to keep away evil or perhaps fire. Since this belief has nothing to do with the Christian story, it indicates that there mush be an older and probably Pagan background to the symbol from which the story of St. Brigid originated. The goddess Brigid's strong personality as well as the strong meaning of this symbol can lead us to connect it to the Irish word Brigi, meaning "strength".
How to make a Brigid's cross
You will need 14 longer strings of some material as well as 4 shorter ones to tie the ends. The traditional materials are, as I have mentioned, reeds and rushes. If you can't manage to find these then of course any other flexible material will do. I tried making mine with rope but it was just too tricky so, in the end, I managed to improvise with that masking (paper) tape that you'll see many house-painters using. It's very cheep (at least where I bought it) and I believe you can find it in any art/hobby/paint/varnish shop and perhaps even in basic office supplies shops. You can even choose the width you prefer! :) I will describe my method in this post and if you're not using this masking tape then you can simply ignore the first two steps. :)
I took the number 14 because, after the cross is made, each arm will have 7 "ends" (I hope you understand what I mean by this). These seven ends represent the seven days of the week and the four arms symbolize the four weeks in a month. Thus, you get the number 28 all together which is the number of days February has (you all know that this sets this month apart from the others). :) Of course, you can decide to use more strings which will give your cross a more circular look to it but I definitely wouldn't recommend using less than fourteen strings.
You will need:
- a pair of scissors
- a material of your choice (rushes/reeds/cords/wire/masking tape or any other flexible material although natural materials are recommended)
- a bit of determination and free time
How to make it:
- Take the tape and cut off 14 even pieces (or another number of your choice). You don't have to be too precise about it since you can simply cut off the excess material when you're done.
- Turn each of the pieces around its own axis so you get a string (look at pictures 1+2).
- You should now have 14 strings of the material of your choice (if your material doesn't need twisting like this then skip step two). :) (picture 3)
- Take two strings and cross them over each other so they make a plus (+) sign i.e. the shape of a Greek cross (a cross with arms of equal length). (picture 4)
- Take a third string and bend it in half over the right side of the horizontal string. (picture 5)
- Take yet another string and bend it in half over the previous string just as you did in step five (picture 6). These two strings should now be crossing one another.
- You can see how the center of your cross should look by now in picture 7.
- Continue twining like in steps 5 and 6 until you get to the last string. Bend him in half over the previous string like you have done up to now but take the penultimate string out a bit like shown in picture 8.
- Get both ends of the last string through the penultimate string and then pull the penultimate string back into its original position. By doing this, you have fixed the last piece into place. (picture 9 is a close-up of this)
- Your Brigid's cross will now almost be finished. The only thing left to do is tie up the ends. You should now have seven ends in each arm. Take your material again and cut four smaller pieces of it off (if you are working with the tape then twirl then as in step two). (pictures 10+11)
- Just so you can understand me more easily, I'll call these four shorter strings laces. Wrap once lace around one arm, the second around the second arm and so on until you have wrapped all for arms. Wrap the laces around as many times as their length will allow you. Once you have done this, you have to make sure the laces don't untangle so its best to tie a little knot with the two ends of each lace or, if you're using the tape I did, it will be enough just to twist the two ends of the lace around each other and bend to either side (since the tape is sticky it will just stick in place). (picture 12)
- If the unequal lengths of the arm ends bother you, you can use your scissors to cut off the excess material (personally, I like this inequality because it seems more natural but it's up to you).
- Cleanse and consecrate your cross any way you see fit and hang it somewhere to protect the space it will be in. :D


And there you have it! You just made a Brigid's cross. :D I hope that I explained everything well enough but in case you're still unsure about some steps, check out the link I mentioned at the beginning of the post or, actually, just click here so you don't have to go looking for it. I made my cross according to the instructions give on that website and I am happy with the results. :) I hope you will be too. :D
If you still aren't sure about something, don't hesitate to e-mail me or leave a comment below. :D I will gladly help if I know how.
Enjoy making your Brigid's cross and I wish you all a blessed Imbolc once more!
Until next time. Yours,
Witch's Cat
Nema komentara:
Objavi komentar
Napomena: komentar može objaviti samo član ovog bloga.